Measure Properties by Role
While non-Admin users are able to edit measure properties in order to create custom overlays, these overlays cannot be seen by other users. Admins, however, have the option to create measure property overlays either for themselves, or at the role level.
While Admins are able to configure measure overlays for user roles in the Admin console, the Measure Properties dialog in Discover offers them a way to construct these overlays on-the-fly, while building reports. The overlays can then be edited in both the Admin console and in Discover.
How to Assign Measure Properties to Roles
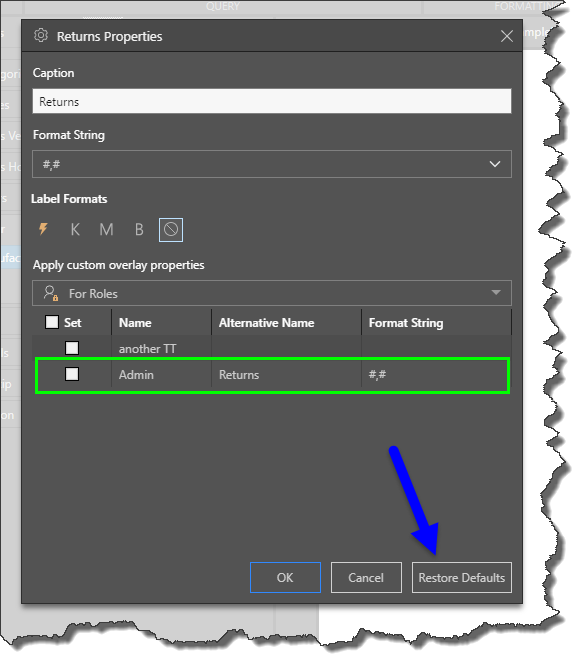
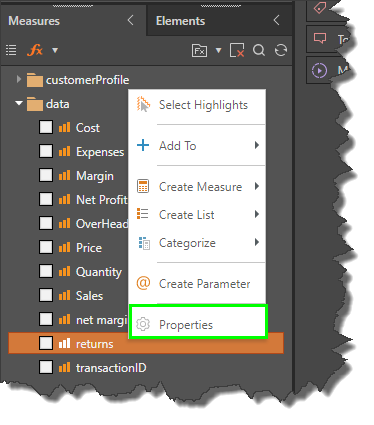
In this example, the caption for the measure 'returns' is changed to 'Returns'. Start right clicking on the measure for which you want to create an overlay; select Properties.
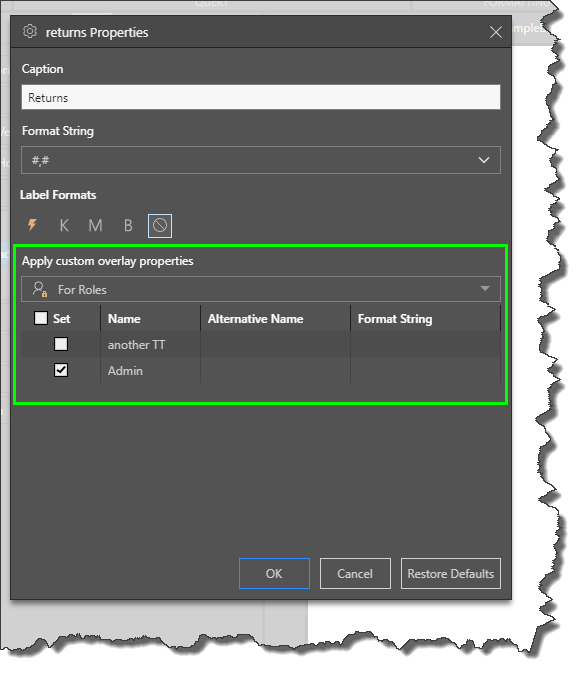
In the Measure Properties dialog, you'll see a drop-down under 'Apply custom overlay properties'; from this drop down you can choose to apply the overlay to yourself only, or to roles.

After editing the caption, format string, and/ or label formats, select 'For Roles' from the drop-down to expose a list of roles. Select the roles you want to assign to the overlay and click OK.
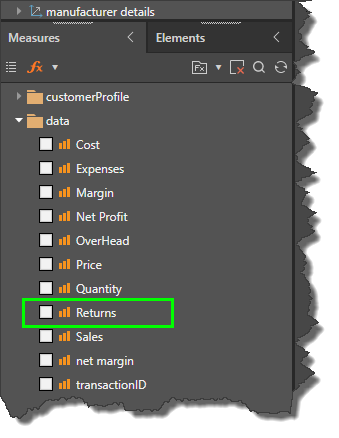
Users belonging to the given role will see the metadata overlay that you configured:
Manage Measure Properties
The overlay properties can be edited from both the Admin console and Discover. To edit from Discover, go back to the measure in the Measures tree, open its Properties dialog again, and edit as required.
Any role that is currently assigned to an overlay in the given hierarchy will display the details of that overlay: the alternative name, and format string.
Restore Default Properties
To remove the overlay properties and revert back to the default measure properties that were set in the model, click 'Restore Defaults'.